Contact Us
If you still have questions or prefer to get help directly from an agent, please submit a request.
Popular topics: Multilogin X, Multilogin 6,
-
Retrieving the token Using the automation token in a workspace Retrieving profile, folder, and workspace IDs Retrieving the user ID Selenium automation example Playwright automation example Puppeteer automation example Logging in to Multilogin automatically Setting up automatic cookie collection Auto-launching the agent Exporting proxy details from profiles Converting external proxy lists into API-ready JSON files Automation FAQ
-
Error: Failed to get IP data: can't connect through proxy Error: Javax.crypto.badpaddingexception: pad block corrupted Status: Update in progress...Loading (1) of 2 components Error: Fingerprint composition failed Connection error due to non-Latin characters in Windows username Error: Mimic/Stealthfox executable is not found Multilogin 6 browser profile shows "Error" in status Can't launch a profile in Multilogin 6 JavaScript error when switching to dark mode in Multilogin 6 Common errors and solutions in Multilogin 6
Using the automation token in a workspace
Written by Jason Nguyen
Updated on August 15th, 2024
Table of contents
Looking for more powerful ways to scale your processes with API? Meet our automation token! Unlike your typical user token, this one comes with a longer expiration period and higher rate limits.
https://api.multilogin.com/workspace/automation_token?expiration_period=<string>
Remember: You don't need to generate an automation token for every request. You can create it once and use multiple times.
In this article, we will show you how to use the automation token in the target workspace: both as an account owner and as a team member.
Using Postman
Workspace owner
- Complete all three steps from this article, including “Using the bearer token”: they will allow you to sign in correctly
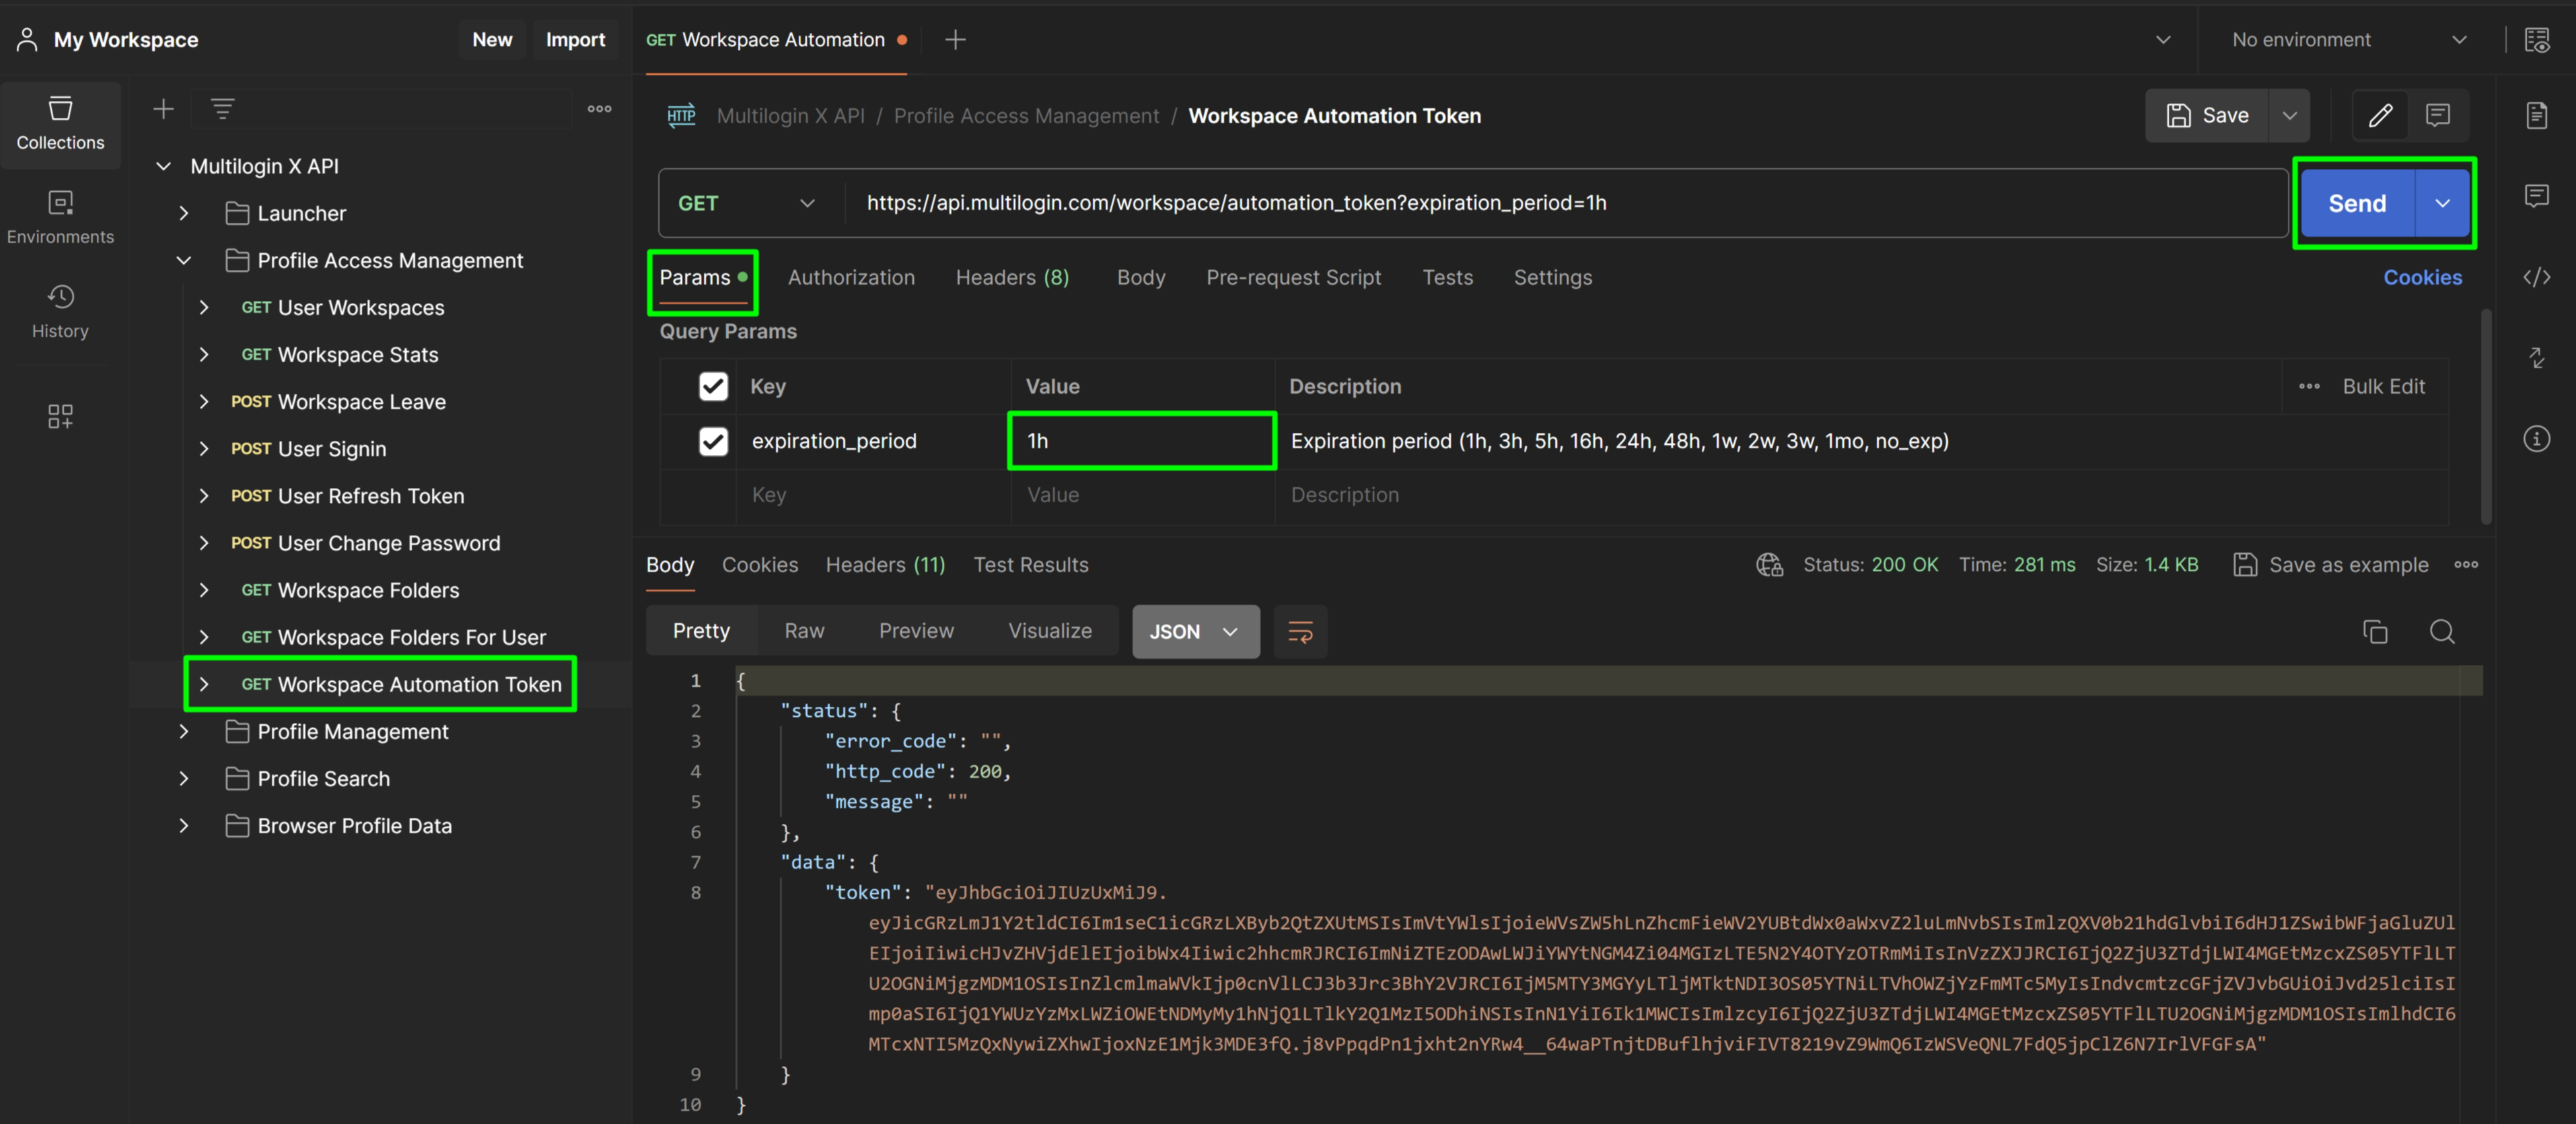
- Go to the “Profile Access Management” folder in your Postman workspace and select “GET Workspace Automation Token”
- In the “Params” tab, fill in the value for the
expiration_periodparameter: this will determine how long the token will last for (check the “Description” column for example values) - Click “Send” to execute the request
- When the token expires, send another request to generate a new one

Team member
- Sign in to your team member account using the “POST User Signin” endpoint
- Copy the
refresh_tokenvalue from the response

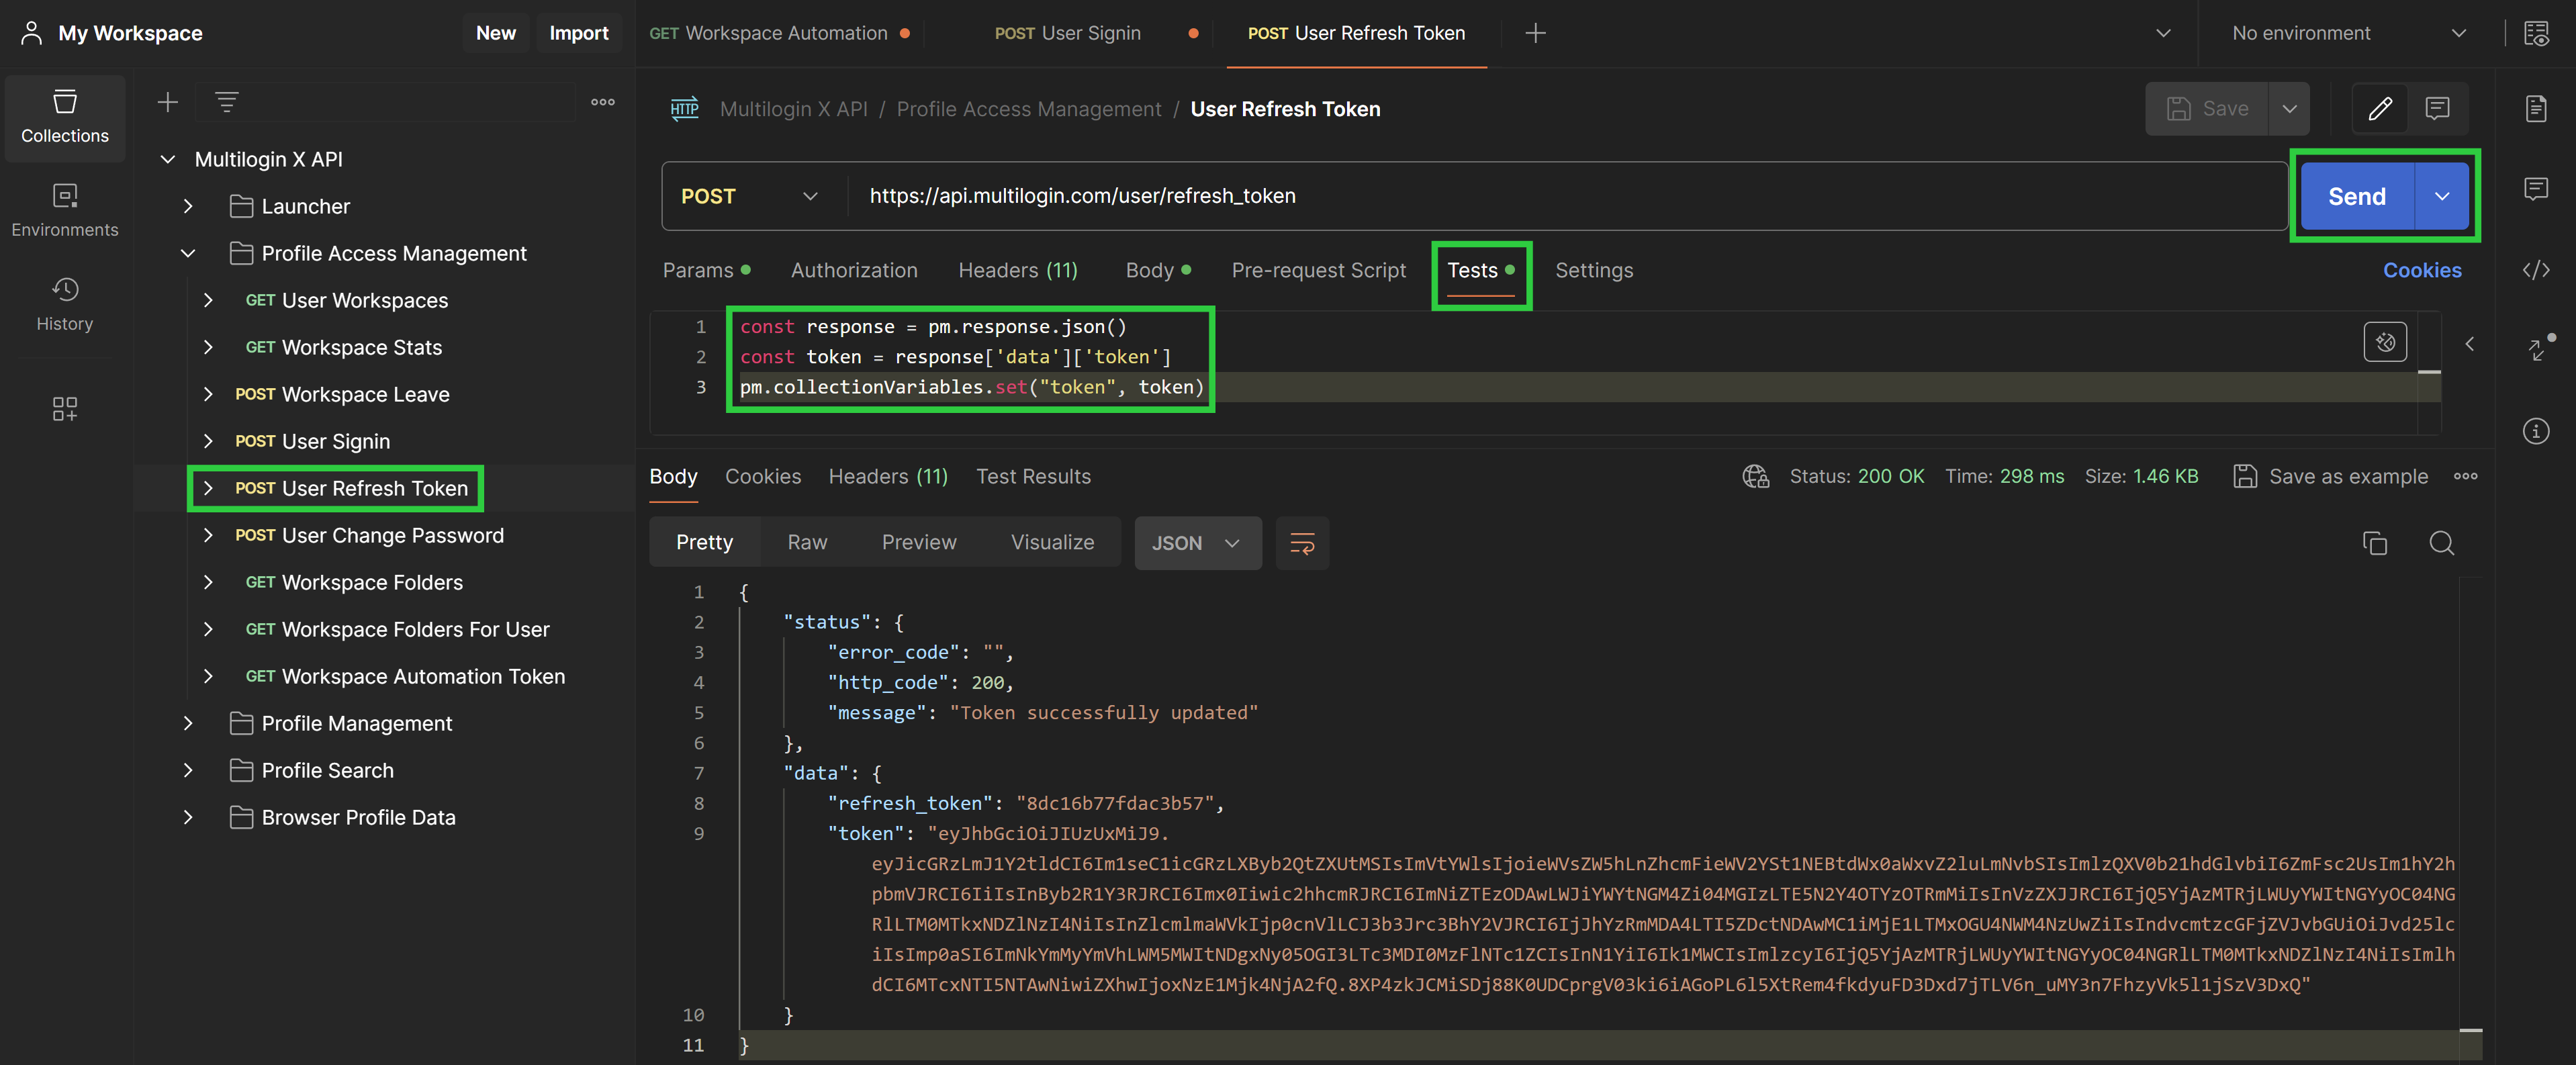
- Go to the "Profile Access Management" folder in your Postman workspace and select “POST User Refresh Token”
- Go to the “Body” tab and fill in the following values:
-
email: Your team member email -
refresh_token: The value from step 2 -
workspace_id: The ID of the target workspace
-
- Go to the "Tests" section, add the following code and save the changes:
const response = pm.response.json()
const token = response['data']['token']
pm.collectionVariables.set("token", token)- Click "Send" to execute the request
- Repeat steps 2 to 4 of the “Workspace owner” section

Troubleshooting
After sending the request correctly, you should see response code 200, which means success.
If you encounter any issues, you might get the following error codes:
- 401 - Incorrect JWT token: This means your sign-in token has expired, or you haven't added the bearer token to your request. To fix this in Postman, sign in again using the “POST User Signin” endpoint and ensure you follow all steps, including obtaining the bearer token.
-
400 - Invalid refresh token: This indicates you've entered the wrong value for
refresh_token. Double-check the description column for examples. -
400 - Incorrect expiration period: This indicates you've entered the wrong value for
expiration_period. Double-check the “Description” column for examples.
 Multilogin X
 Multilogin 6